
How to configure a Teltonika RUT240 APN Settings
These configuration instructions are for the Teltonika RUT240 4G LTE router however, all the Teltonika routers (rut2xx, rut9xx) have a similar webui, firmware and functionality and therefore the configuration guide should work for your device but please check your firmware version if you are not sure.
The Teltonika RUT240 is a 4G LTE mobile network router for IoT (internet of things) applications.
It includes a single SIM card slot, two ethernet ports (1 x WAN, 1 X LAN) and a WiFi access point
Step1
First of all turn on your teltonika router and either connect an Ethernet cable to the router or search for the WiFi SSID and connect wirelessly to the router.
The default username and password along with the default WiFi SSID is located on the back of the Teltonika router.
Once you have a connection to the router please input the default gateway IP Address into a web browser on the same machine you are connected to the router with. The default IP address is 192.168.1.1 (our screenshot below shows 192.168.50.1 as we have changed the IP for demonstration purposes for this guide).
Once you have access to the Teltonika Administrator interface please input the Teltonika default admin username and password as detailed on the back of the router.
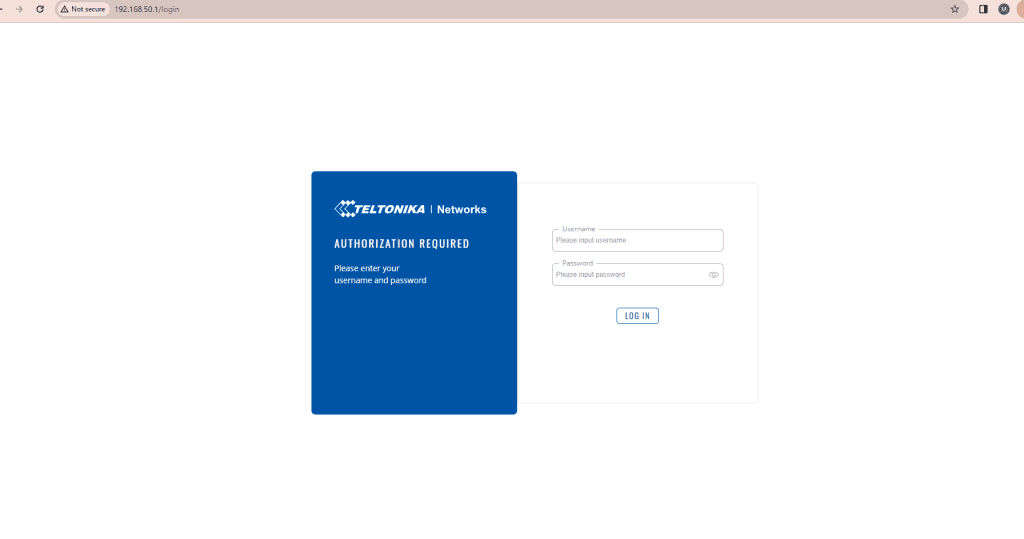
Once you have logged in to the Teltonika router it will ask you to amend the default password of the router. Please change the password and keep a record of the new password so you can access the router in the future.
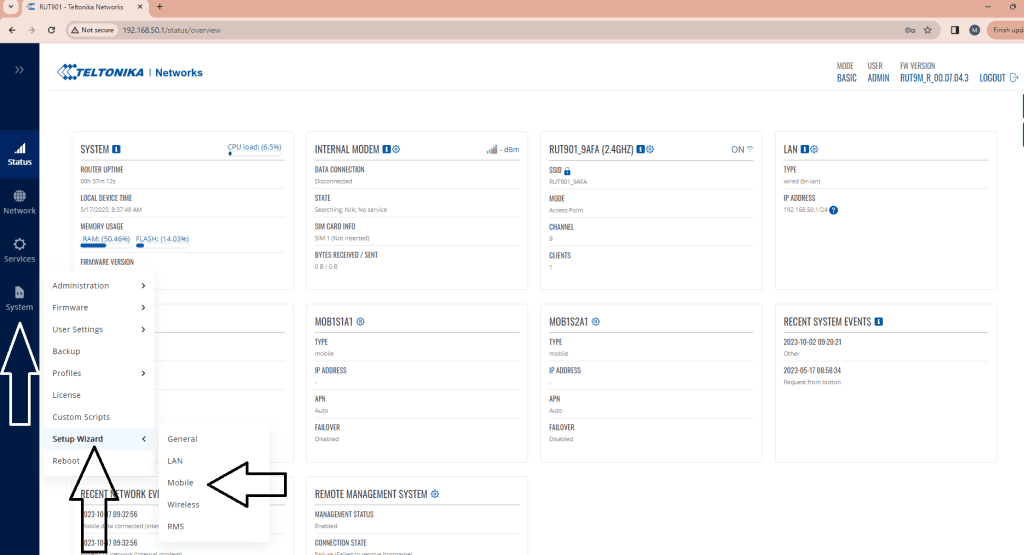
To configure the APN details from the main admin page we need to choose System - Setup Wizard - Mobile.
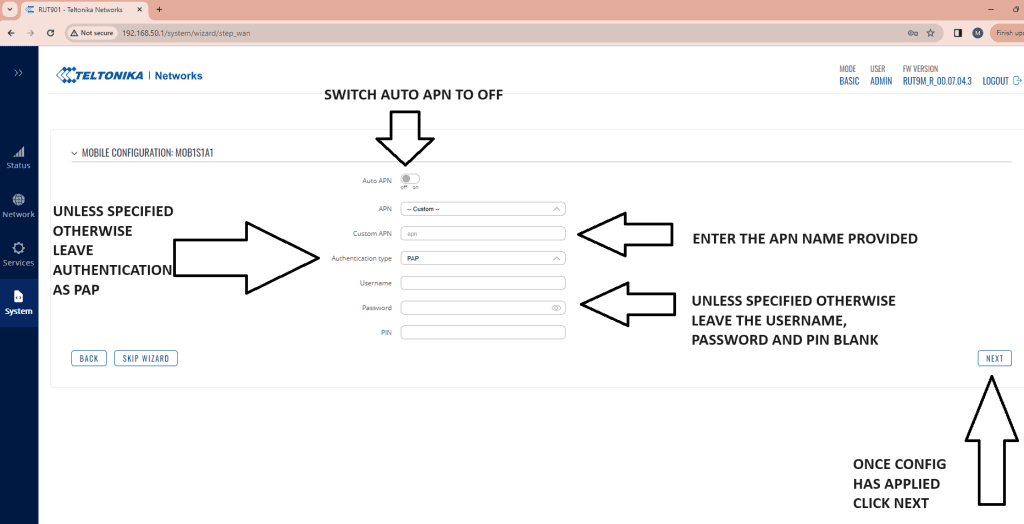
On the Mobile connection Wizard if Auto APN is not supported by your provider then we need to switch "Auto APN" to off and enter the APN details manually.
Unless otherwise specified the Majority of our Iotie SIM cards just require the APN name, and Authentication type set as PAP. All other fields are left blank. Once the config has been entered click next.
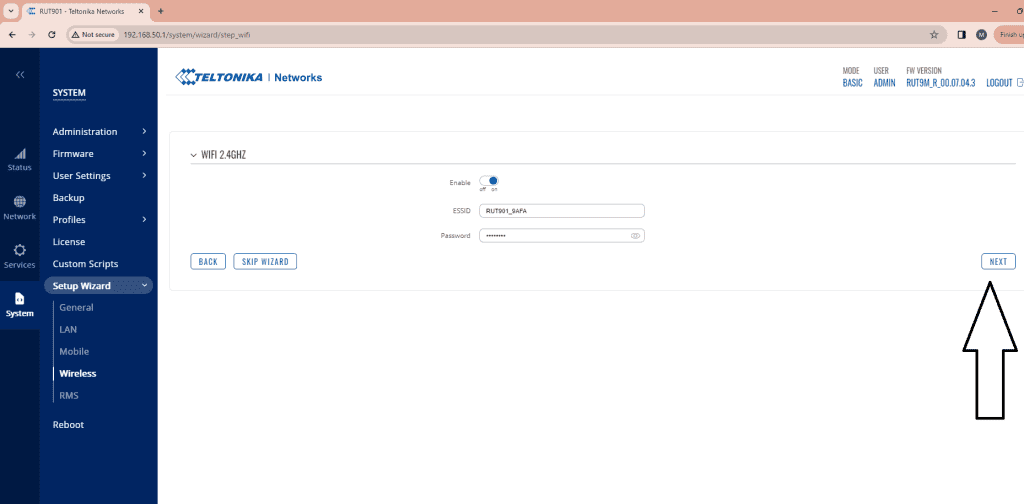
On the next screens you can complete the WiFi set-up to change the SSID once configured click next
Then on the next page enable the Teltonika RMS settings if you have brought an RMS licence and click on finish to apply the configuration.
This has completed the APN setting configuration for Teltonika.
For details on our APN settings please click here